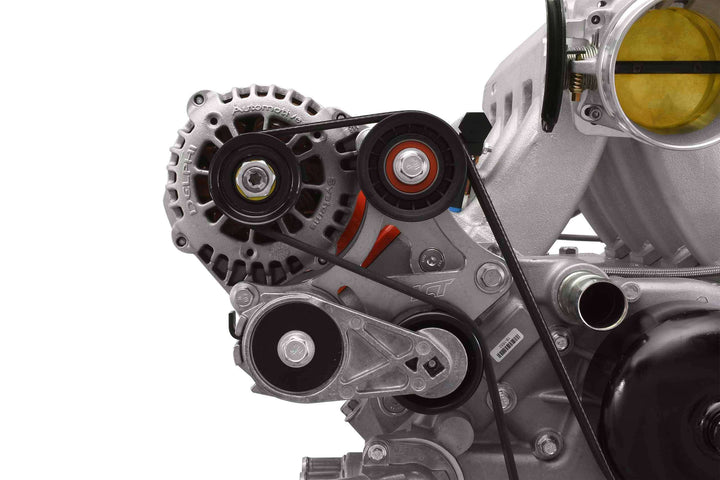
The LS1 engine, renowned for its performance and versatility, often undergoes modifications to enhance its efficiency and fit into various vehicle frames. One such modification involves the relocation of the alternator using a specially designed bracket. This guide will walk through the steps of installing an LS1 alternator relocation bracket, ensuring a smoother installation and improved engine bay aesthetics. Whether it’s for space management or to accommodate additional components, understanding this process can be crucial for car enthusiasts and professionals alike.
Why Relocate the Alternator?
Relocating the alternator on an LS1 engine can offer several advantages:
- Space Optimization: Adjusting the position of the alternator can free up space for other components or customizations.
- Improved Cooling: Relocation can enhance airflow around the engine, aiding in better cooling.
- Enhanced Aesthetics: A well-organized engine bay not only looks visually appealing but also facilitates easier maintenance.
Tools and Materials Needed
Before starting the installation process, gather all necessary tools and materials:
- LS1 alternator relocation bracket kit
- Socket set and ratchet
- Torque wrench
- Belt tensioner tool
- Wrench set
- Protective gloves
Step-by-Step Installation Guide
Preparation
Before beginning the installation, ensure the engine is cool to avoid any risk of burns or injury. Disconnect the battery to prevent any electrical hazards during the installation process.
Removing the Existing Alternator
- Use the belt tensioner tool to relieve tension from the serpentine belt, and then remove the belt from the alternator pulley.
- Disconnect the wiring harness and any other electrical connections from the alternator.
- Remove the bolts securing the alternator to its current bracket and carefully lift the alternator out of the engine bay.
Installing the Relocation Bracket
With the alternator removed, proceed with the installation of the new LS1 alternator relocation bracket:
- Position the relocation bracket in the desired location, ensuring it aligns with the mounting points on the engine block.
- Secure the bracket using the bolts provided in the kit, tightening them to the manufacturer’s specified torque rating.
Mounting the Alternator
- Place the alternator onto the new bracket, aligning the mounting holes.
- Secure the alternator using the original bolts or those provided in the relocation kit.
- Reconnect the wiring harness and any other electrical connections to the alternator.
Reinstalling the Serpentine Belt
Carefully route the serpentine belt over the pulleys, ensuring it is properly aligned and seated in the grooves:
- Use the belt tensioner tool to apply tension to the belt.
- Double-check the belt’s alignment and adjust if necessary to prevent potential slippage or wear.
Final Checks and Testing
After completing the installation, reconnect the battery and start the engine to test the alternator’s functionality in its new position. Observe the belt’s movement and listen for any unusual noises that may indicate misalignment or installation errors.
By following this comprehensive guide, the LS1 alternator relocation can be executed efficiently, optimizing engine space and performance. For more details on components and accessories, explore the range of billet accessory brackets available for the LS1 engine.